|
Don't have a camera? Don't have photos? It is raining today? No problem!
Now that you are equipped with the best tools and my crappy photos, we can start the tutorial.
Step 2 – Stitching the photos
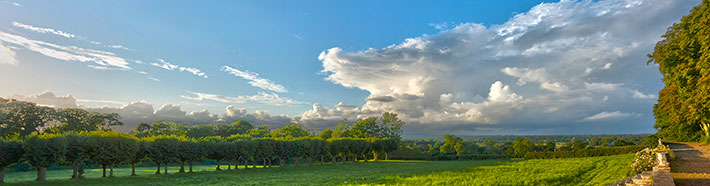
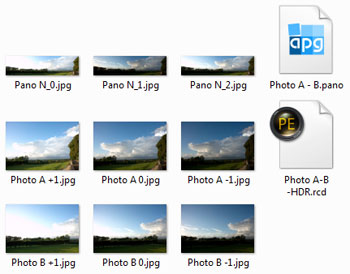
The provided zip archive contains six photos: two sets of three bracketed photos. The exposures are -1, 0 and +1EV for each set.
I took these images handheld without any tripod or support. The panorama was created without alignment help using my old Canon 40D a few years ago (I am not even sure that I planned to create a panorama at the time I took these photos).
This is the worst case scenario for building an HDR Panorama: none of the images are aligned. Let's see if we can create a nice panorama with this poor material.
The first step is to stitch the photos together with the same exposures. Fortunately, Autopano can do that automatically for us without having to select the photos one by one.
Launching Autopano Giga:
- Run Autopano.
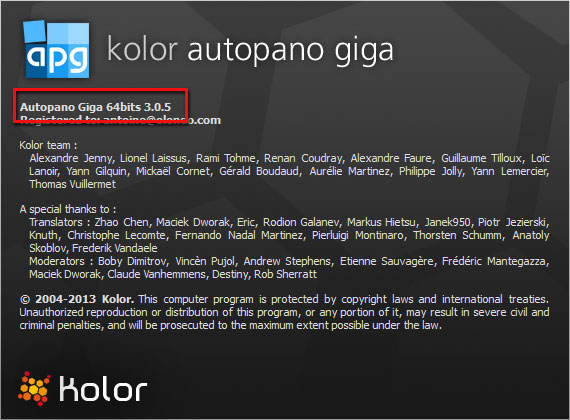
- Select 'about' in the 'Help' menu
- Verify that the version is 3.0.5 or higher
- If not, select 'Check for updates…' and install the latest update
- This step is required to complete the tutorial
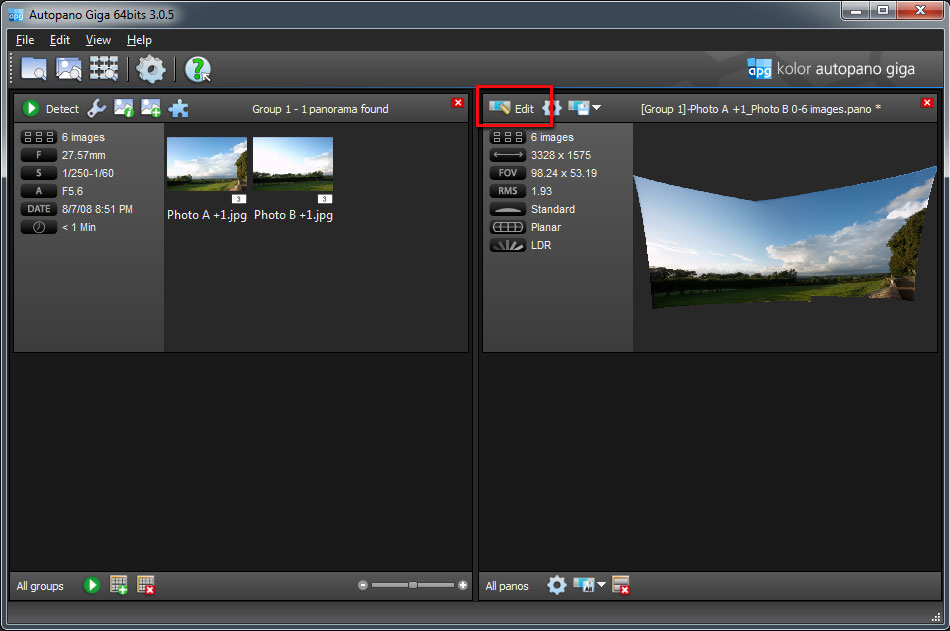
Selecting the photos:
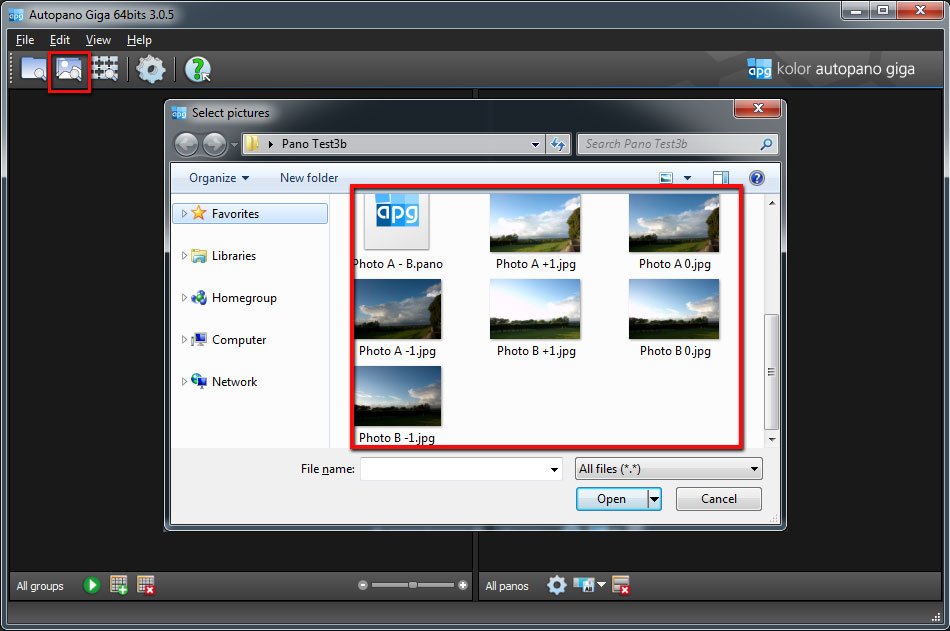
- Click the 'Select images' button or use the 'Edit' menu
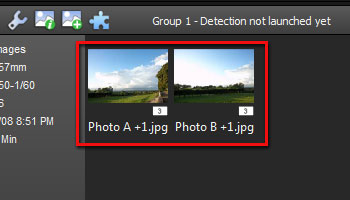
- Select the six provided photos: Photo A -1.jpg, Photo A 0.jpg, Photo A +1.jpg, Photo B -1.jpg, Photo B 0.jpg, Photo B +1.jpg
Autopano discovers that the photos are two bracket sets and automatically groups the photos in two sets of three photos.
There are many stitching and group options in Autopano. With our workflow, we can use the deafult settings.
We are done with preparing the images. Autopano is ready to stitch the photos and build the panorama.
Building the panorama:
- Select 'Detect' in the 'Edit' menu (or click the 'Play' button)
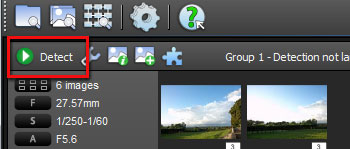
Autopano creates the panorama. When done, the panorama appears at the right of the screen.
Step 3 – Editing the panorama
With these photos, there is little editing needed. Autopano is able to stitch the images without issues; the default projection and orientation are correct. We just need to straighten the horizon and crop the panorama.
Editing the panorama:
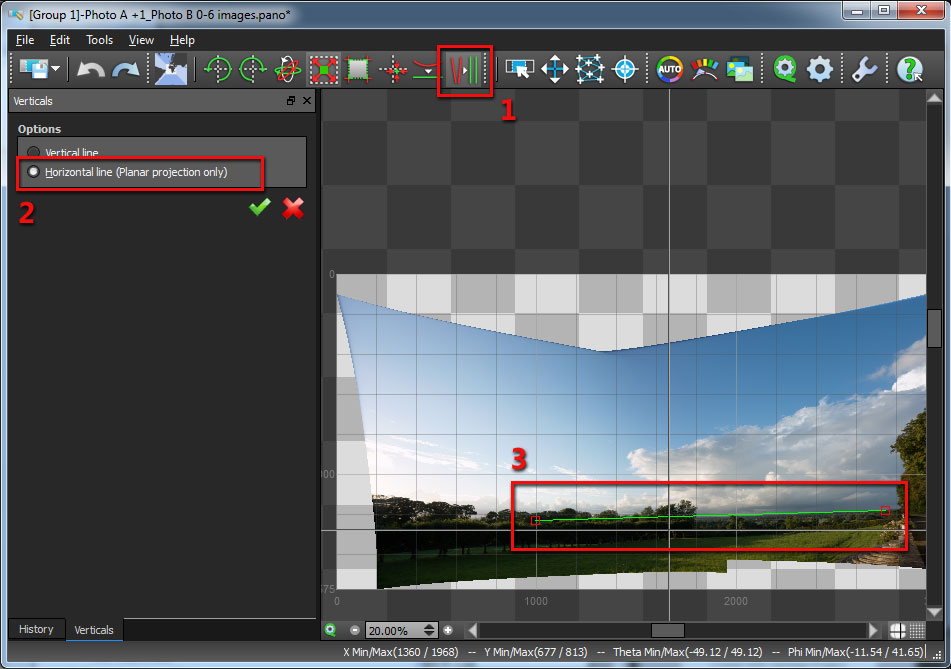
- Click the 'Edit' button located at the right of the screen
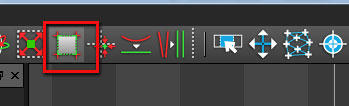
There are several ways to straighten the horizon in Autopano. Here is one method:
Straightening the horizon:
- Click the 'Vertical Tool' button
- Select 'Horizontal line' in the left panel
- Draw a line on the horizon
- Apply the change
Cropping the panorama:
- Click the 'Crop' button
- Adjust by dragging the handles of the yellow frame
- Apply the change
We are now ready to render the panorama.
Step 4 – Rendering the panorama
Autopano Giga is an excellent stitching and panorama tool. PhotoEngine is the reference in professional HDR imaging. Let's make sure we use the right tool for the right job:
- Autopano to stitch and build the panorama (and only that)
- PhotoEngine to build and edit the HDR image
How can we make sure that PhotoEngine handles the entire HDR process? The right way is to render the panorama in multiple layers in Autopano: one layer for each exposure. Here is how to do that:
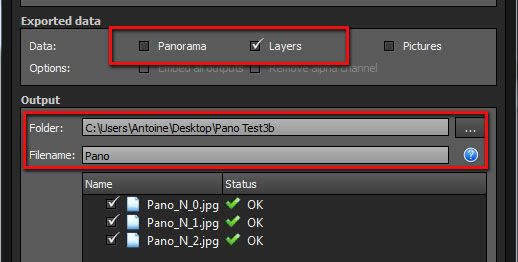
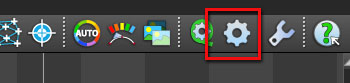
Setting the rendering options:
- Click the 'Render' button (cogwheel icon)
- In the 'Exported data' panel, uncheck the 'Panorama' checkbox
- Check the 'Layers' checkbox
- In the 'Output' panel, set the output folder and file names
- Leave the 'Render' window open
With these options, Autopano is ready to render three panoramas, one for each of the original exposures (-1, 0 and +1EV).
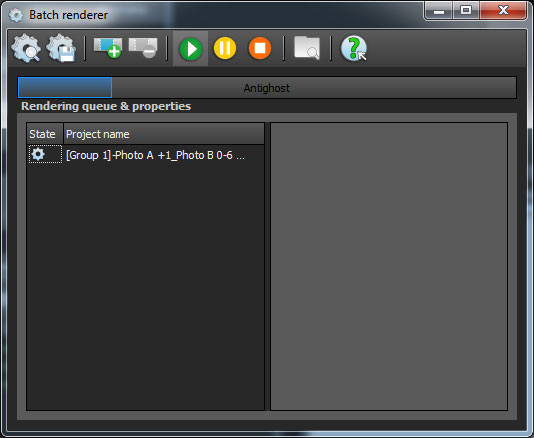
Rendering the panorama layers:
- Click the 'Render' button located at the bottom
Autopano open the Batch Window and starts rendering. Check the progress. When done, we are ready to move to PhotoEngine.
Step 5 – Building the HDR panorama
All the next steps are done in Oloneo PhotoEngine. If you have not installed the product yet, you can get the trial.
The first step is to create a HDR image made from the three layers rendered by Autopano.
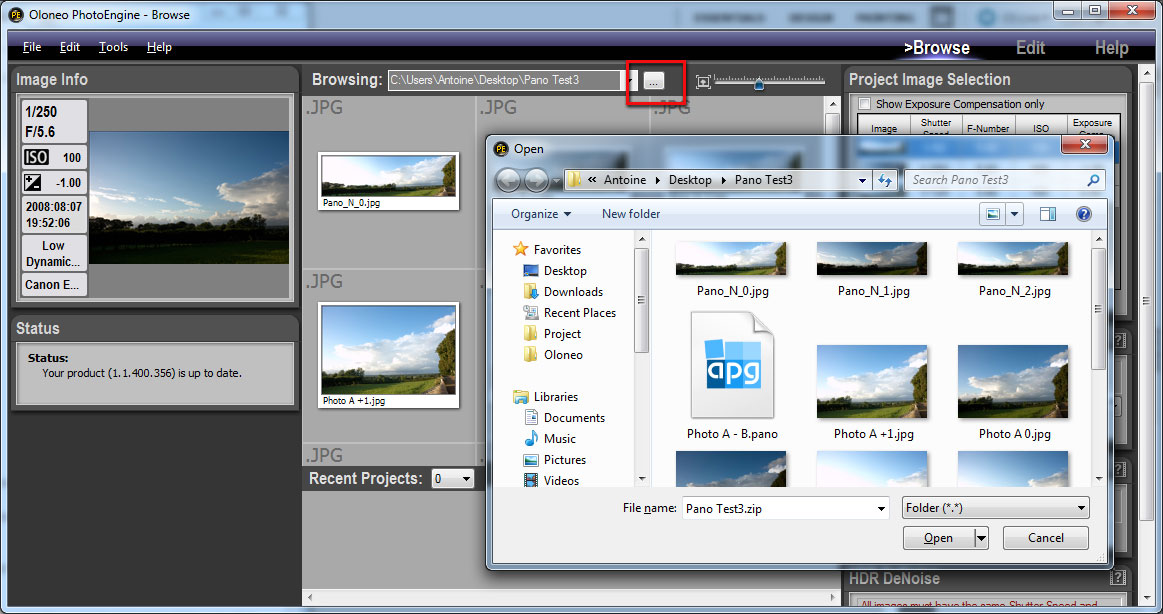
Locating the photos:
- Start PhotoEngine
- Click on the “...” button located in the top Browsing toolbar
- Using the File Dialog, navigate to the folder containing the rendered panoramas
- Click on the Open button
PhotoEngine displays the photos contained in the selected folder. Let's create a new HDR ToneMap Project with the Panorama Layers.
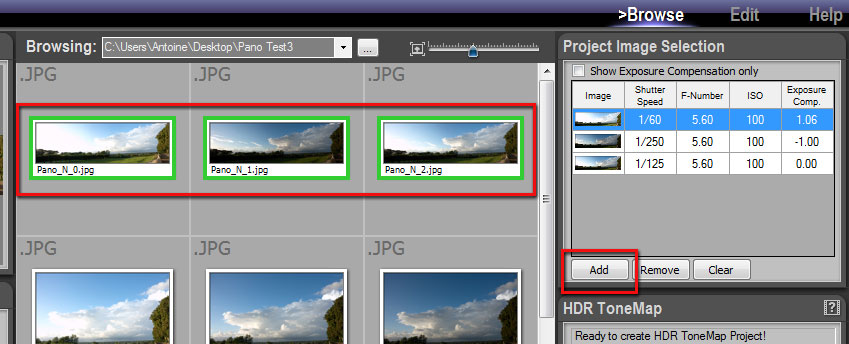
Selecting the photos:
- Scroll the thumbnail list until you see the three panorama images
- Control-Click on each photo
- In the 'Project Image Selection' panel, click on the 'Add' button
Creating the HDR ToneMap Project:
- Click the Create HDR ToneMap Project
- Leave all other options at their default settings
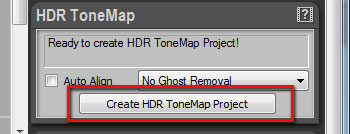
PhotoEngine automatically assembles the three panorama exposures to build an HDR image.
For detailed info about creating an HDR ToneMap project in PhotoEngine, read the manual.
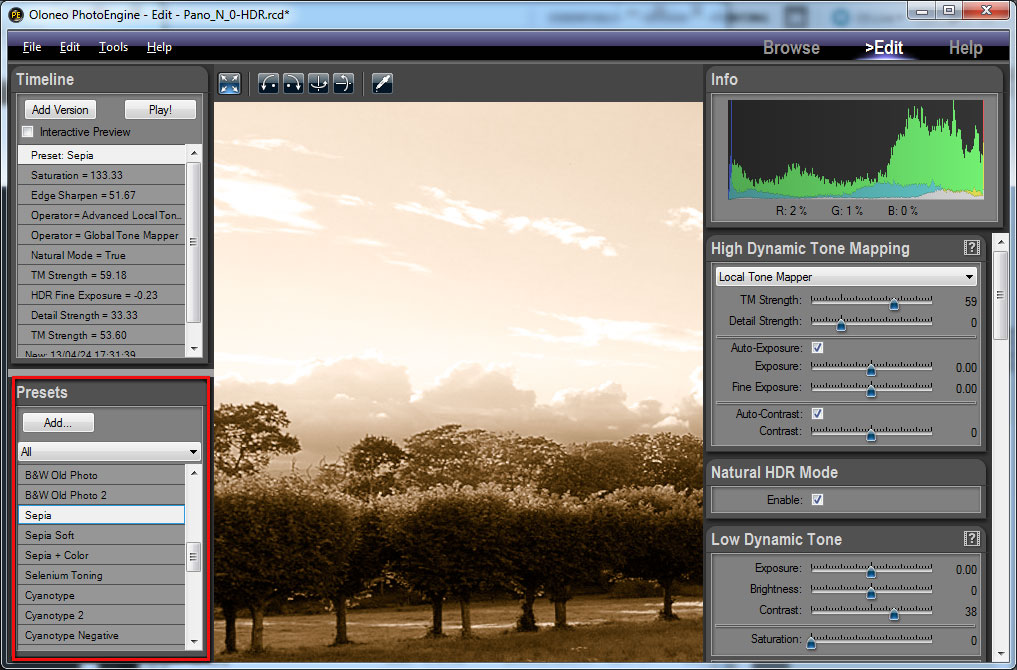
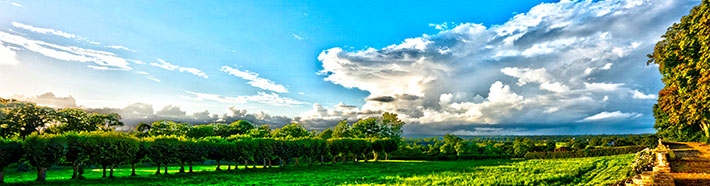
Step 6 – Editing the HDR panorama
Once the HDR image is created, you can edit the panorama in real-time with a precision of 96-bit per pixels and ultra wide color gamut. This allows you to quickly try various image renderings.
If you are not familiar with Oloneo PhotoEngine, the quickest way to discover the product is to use the presets.
Previewing a preset:
- Move the mouse pointer without clicking over any preset located in the Preset panel
- PhotoEngine immediately updates the image with the preset settings
- Move the pointer away to restore the current settings
Applying a preset:
- Click on a preset located in the Preset panel
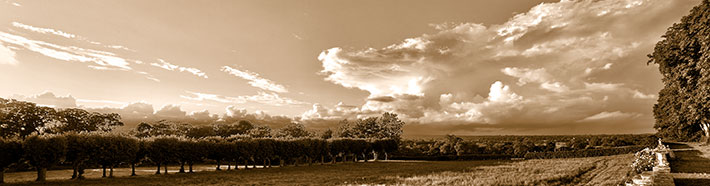
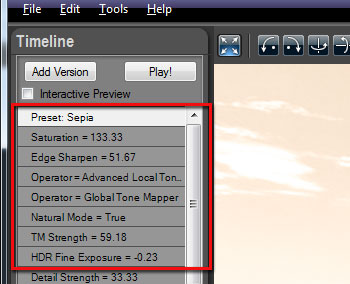
PhotoEngine works in real time so it is fun and easy to explore the possibilities: subtle effects, grunge HDR, black & white, sepia, etc. Do not hesitate to mess with the settings! Everything is recorded in the 'Timeline' panel located at the top left. You can always go back to a previous step by clicking a previous level in the 'Timeline'.
Step 7 – Saving the HDR panorama
When done, you can save your final panorama image or send it automatically to Adobe Photoshop (or other tool) for further editing.
Exporting to TIFF or JPEG:
- Press Ctrl-Shift-S or select Save As… in the File menu
- In the File Dialog, select: TIFF (*.tif) or JPEG (*.jpg)
- Enter the file name
- Click the Save button
- Select the TIFF or JPEG settings
- Click the OK button
Exporting directly to an external editor:
- Press Ctrl-E or select Export To My Tool... in the File menu
- Enter the file name
- Click the Save button
- Select the save settings
- Click the OK button
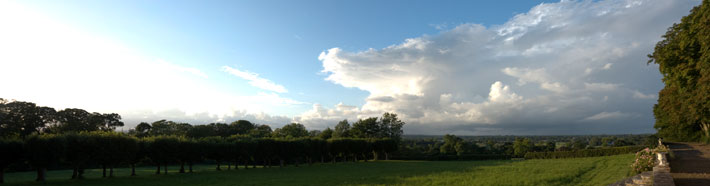
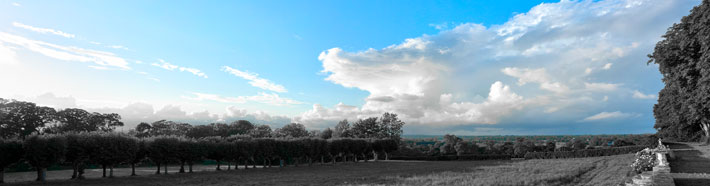
Final comments
I hope you enjoyed this tutorial. I believe that the presented workflow is efficient in terms of speed, flexibility and quality for medium to large panoramas.
A different workflow is probably needed for very large panoramas (hundreds of Megapixel to Gigapixel ones). I am yet to try that so I do not have a definitive answer to that question.
|